

Enclosures · Intermediate · 9 min read
Designing enclosures for 3D printing
Wall thickness, clearances, openings and printing without supports.
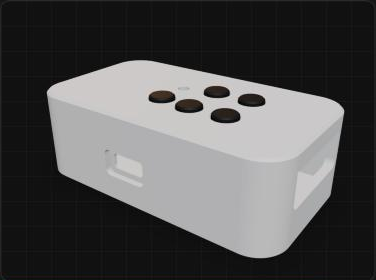
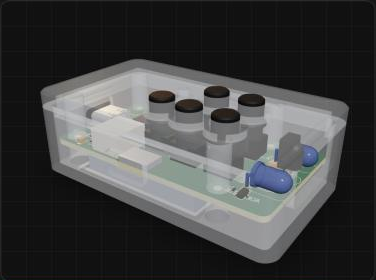
A good case does three jobs: it protects the board, it lets you reach everything you need to press, plug in or see, and it prints cleanly the first time. Here's how to think about each one, using the IR Remote Cloner's case as the example.
- Outside
- 74 × 44 × 20 mm
- Wall
- 2.4 mm
Openings it needs
- USB-C port
- Power switch
- IR window
- 5 buttons
- Status light
Start from the board, not the box
Design the case around the finished board, never the other way round. You need three numbers from the board:
- Outline: the board's width and depth, plus a little clearance on every side (about 0.5 mm) so it drops in without forcing.
- Tallest part: the height of the tallest component, plus at least 1.5 mm, sets the inside height above the board.
- Mounting holes: the case gets posts (standoffs) exactly under the board's holes, so the board sits flat and doesn't rattle.
Walls and corners
- Wall thickness: 2 to 2.5 mm for PLA or PETG. Thinner walls flex and crack; thicker ones just waste plastic and time.
- Rounded corners: a corner radius of a few millimetres feels better in the hand and is stronger than a sharp corner.
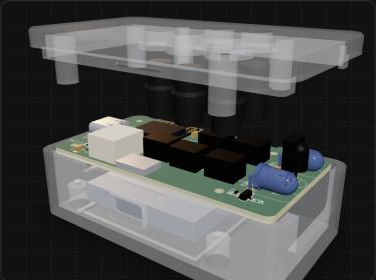
- Split line: most cases split into a base and a lid. Put the split where it's easy to assemble, usually just above the board.
Openings
Every part you touch or look at needs a way through the case:
| Part | Where the opening goes |
|---|---|
| USB-C port | Side wall, with a little room for the plug's moulded shell |
| Power switch | Side wall, with space for a fingernail |
| Buttons | Lid, with a printed cap that presses the switch |
| Status light | Lid, a small hole or a light pipe |
| IR LEDs and receiver | Side wall, one window in front of them |
| Sensors | Lid, vent slots so air reaches them |
Line each opening up with its part to within about 0.3 mm. Printers aren't perfectly precise, so make holes about 0.2 mm larger than the part they fit around.
Printing without supports
Supports are extra plastic the printer adds under overhangs. They waste time and leave rough surfaces, so design them away:
- Print each part on its flattest face. The base prints upright; the lid prints upside down, with its top on the bed.
- Keep overhangs under 45°. Anything steeper sags without support.
- Short bridges are fine. A printer can stretch plastic across a gap of about 10 to 15 mm.
- Chamfer instead of overhang. A 45° bevel under a ledge prints cleanly where a flat ledge would droop.
Holding it together
- Snap fits: small hooks on the lid click into the base. No hardware, and they print well in PETG.
- Screws into heat-set inserts: a soldering iron presses brass inserts into the plastic, and machine screws hold everything. Stronger, and you can open it again and again.
Where Kiln Forged fits in
Kiln Forged designs the case from the real board: it cuts every opening, places the posts, checks clearances and confirms it prints without supports. You get a STEP file to keep editing in SolidWorks, Fusion or Onshape, and STL files ready for your printer.